While driving I noticed that the fan in the cabin of the Audi A4 was becomming tempermental. 50% of the time when I would press on the button to demist the front windshield it would fail to start up. I hate having to wipe the glass as it leaves streaks, so I was forced to drive with the windows wound down to get enough air through the cabin to clear the glass. Not the safest of options.
I got the laptop out, connected the VCDS cable and ran the software. I got the following error related to the Heating, ventilation, and air conditioning (HVAC) module in the car.
Address 08: Auto HVAC (J255) Labels: None
Part No SW: 8T2 820 043 K HW: 8T2 820 043 K
Component: KLIMA 1 ZONE H05 0120
Revision: B0000000 Serial number: 0126.02.080837
Coding: 34040000
Shop #: WSC 06325 000 00000
VCID: 3A6225DBEC5F60D2112454D-806F
2 Faults Found:
01273 - Fresh Air Blower (V2)
003 - Mechanical Failure - Intermittent
Freeze Frame:
Fault Status: 00100011
Fault Priority: 3
Fault Frequency: 55
Reset counter: 179
Mileage: 264877 km
Time Indication: 0
Date: 2018.12.29
Time: 16:27:51
Freeze Frame:
Temperature: 11.0°C
Speed: 0.0 km/h
Load: 0.0 %
Load: 8.5 %
01273 - Fresh Air Blower (V2)
006 - Short to Plus - Intermittent
Freeze Frame:
Fault Status: 00100110
Fault Priority: 3
Fault Frequency: 14
Reset counter: 179
Mileage: 264877 km
Time Indication: 0
Date: 2018.12.29
Time: 16:27:53
Freeze Frame:
Temperature: 11.0°C
Speed: 0.0 km/h
Load: 0.0 %
Load: 32.5 %
Voltage: 11.60 V
Googling keywords from the issue informed me that the fan/blower motor had to be replaced. New, this part is about 120e off ebay. To do this, I would need the part number to look for. So I would have to take it out to have a look at it.
I roughly followed this guide here to remove the glove compartment. https://www.youtube.com/watch?v=9d3zL-7kJBQ Note, some guides will advise you to remove the Radio to get at some bolts. I did this, but found that there were no bolts that needed removing. So dont do that.
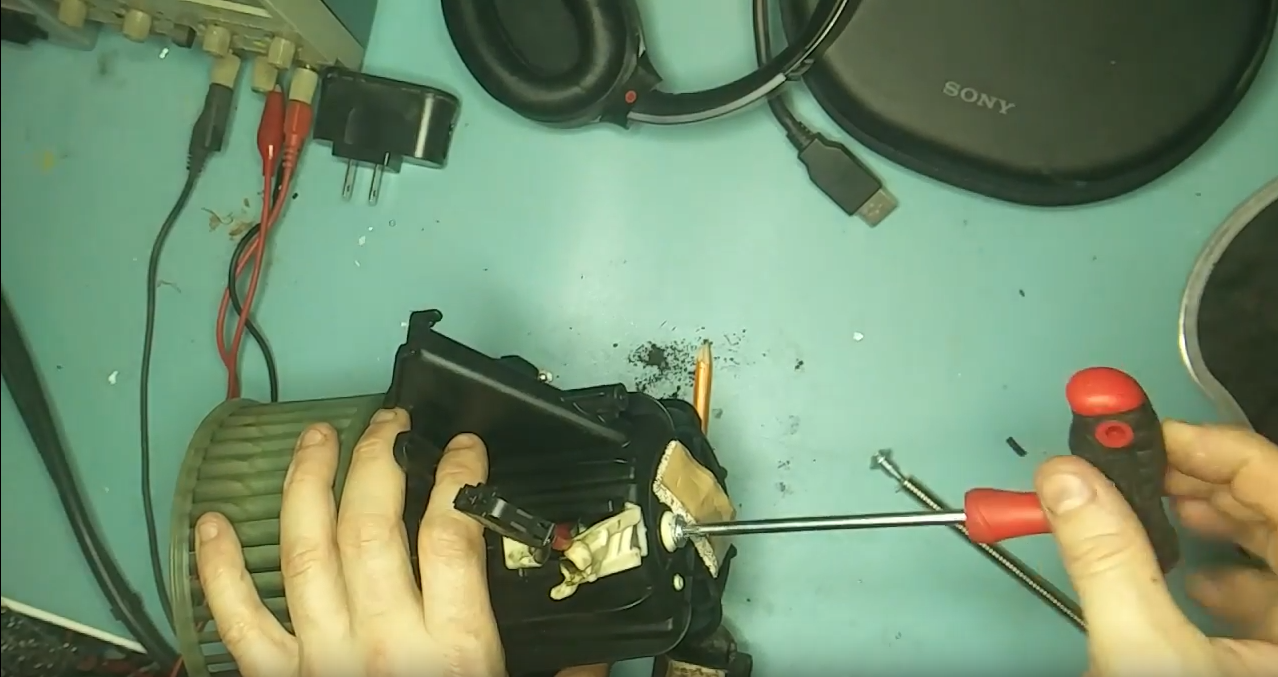
there are about 5 screws to remove from the glove compartment. Two on top, about two on bottom, and one under the panel to the left of the compartment inside the door. Once removed, you will need to disconnect a cable going from the car to the airbag enable/disable switch in the glove compartment. Once this is removed, put the glove compartment aside. You will see the power resistor for the fan and the fan itself. One screw holds the fan. Remove this, and then with two hands, firmly twist the fan housing to remove the whole fan. The blower/fan will look like the following:
 I cleaned out the cage for any debris. I spun the fan by hand and found that it was very stiff, only spinning for less than one second before stopping again.

I hooked it up to a 12v power supply limited at 2 amps and found that it turned slowly.


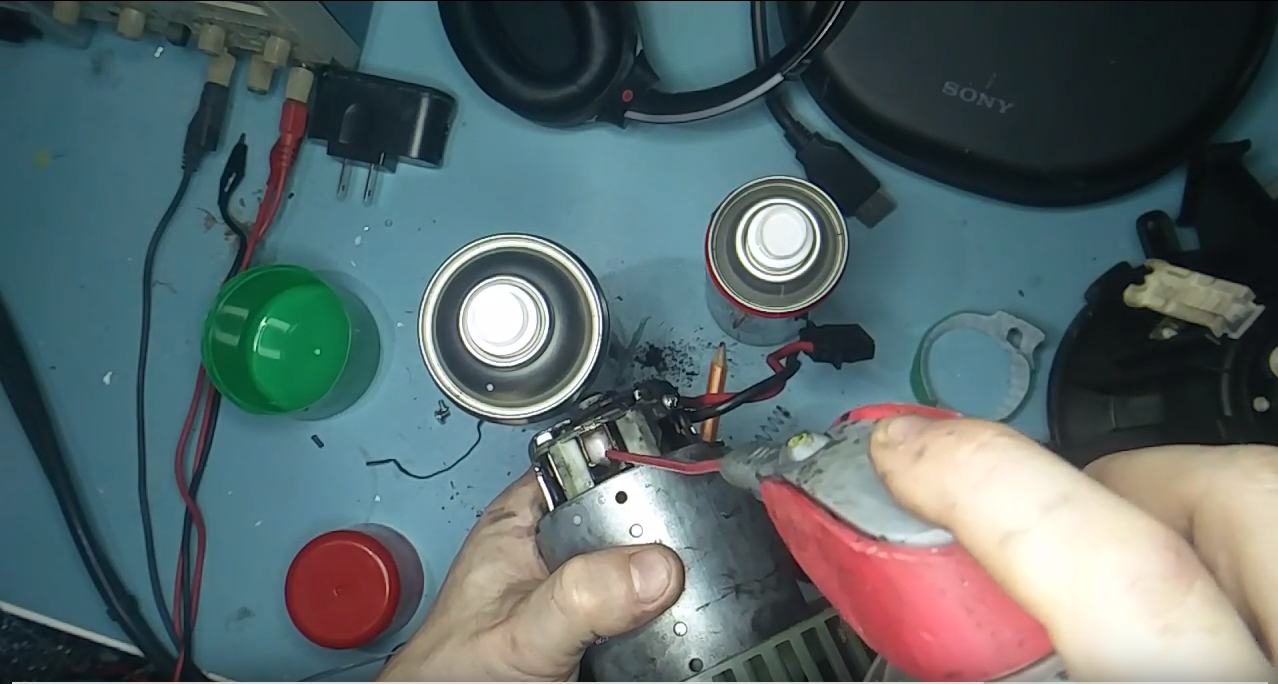
Looking at the part number, it is 8k2 820 021. This is not meant to be a user serviceable part, but as I had nothing to loose, I decided to open it.
I removed the back cover, it is held in place by two screws

I bent back the two copper gates holding spring for the carbon brushes in place. This allowed me to remove the spring and spray some WD40 into them to make sure that they came in and out freely. The brushes had about half their life left. Leave the springs out along with the brushes pulled out.
 I then sprayed the bushing closest to the cage too
 Next, I decided to have a look at the rear bearing and the commutator. To do this, we have to remove the back piece of metal covering the rear bearing. This is held in place against the main housing by a few crimps in the metal. These can be teased up by a flat screwdriver. Unfortunately, I do not have any photos or video of this.
You will now be able to see the commutator. You can see that there is alot of carbon buildup on the copper, along with wear patterns from the brushes.

This can be cleaned with a bit of sandpaper. I put the cage end into the chuck of an electric drill, held the sandpaper against the commutator, and spun it to smooth and clean it.

Then I used a dental pick to clean between the copper contacts on the commutator for any bits of copper or carbon that might short it.

The rear bushing got spray of wd40 too. I pressed the rear metal housing back into place again. This will require a few goes and some patience. A few taps of a small hammer bent the crimps back into place.

Screw the rear black plastic housing back into place again. I tested it with the power supply again and it appeared to spin with more speed. Manually spinning the cage resulted in it continuing to spin for 2-3 seconds before coming to a stop. Not great, but definitely better than before.
I installed it back into the car. VCDS along with the cable was used to reset the all errors on the car. After a month of use, the fan works now as expected, and there are no errors showing up on VCDS. Success!
I got the laptop out, connected the VCDS cable and ran the software. I got the following error related to the Heating, ventilation, and air conditioning (HVAC) module in the car.
Address 08: Auto HVAC (J255) Labels: None
Part No SW: 8T2 820 043 K HW: 8T2 820 043 K
Component: KLIMA 1 ZONE H05 0120
Revision: B0000000 Serial number: 0126.02.080837
Coding: 34040000
Shop #: WSC 06325 000 00000
VCID: 3A6225DBEC5F60D2112454D-806F
2 Faults Found:
01273 - Fresh Air Blower (V2)
003 - Mechanical Failure - Intermittent
Freeze Frame:
Fault Status: 00100011
Fault Priority: 3
Fault Frequency: 55
Reset counter: 179
Mileage: 264877 km
Time Indication: 0
Date: 2018.12.29
Time: 16:27:51
Freeze Frame:
Temperature: 11.0°C
Speed: 0.0 km/h
Load: 0.0 %
Load: 8.5 %
01273 - Fresh Air Blower (V2)
006 - Short to Plus - Intermittent
Freeze Frame:
Fault Status: 00100110
Fault Priority: 3
Fault Frequency: 14
Reset counter: 179
Mileage: 264877 km
Time Indication: 0
Date: 2018.12.29
Time: 16:27:53
Freeze Frame:
Temperature: 11.0°C
Speed: 0.0 km/h
Load: 0.0 %
Load: 32.5 %
Voltage: 11.60 V
Googling keywords from the issue informed me that the fan/blower motor had to be replaced. New, this part is about 120e off ebay. To do this, I would need the part number to look for. So I would have to take it out to have a look at it.
I roughly followed this guide here to remove the glove compartment. https://www.youtube.com/watch?v=9d3zL-7kJBQ Note, some guides will advise you to remove the Radio to get at some bolts. I did this, but found that there were no bolts that needed removing. So dont do that.
there are about 5 screws to remove from the glove compartment. Two on top, about two on bottom, and one under the panel to the left of the compartment inside the door. Once removed, you will need to disconnect a cable going from the car to the airbag enable/disable switch in the glove compartment. Once this is removed, put the glove compartment aside. You will see the power resistor for the fan and the fan itself. One screw holds the fan. Remove this, and then with two hands, firmly twist the fan housing to remove the whole fan. The blower/fan will look like the following:


I hooked it up to a 12v power supply limited at 2 amps and found that it turned slowly.


Looking at the part number, it is 8k2 820 021. This is not meant to be a user serviceable part, but as I had nothing to loose, I decided to open it.
I removed the back cover, it is held in place by two screws
I bent back the two copper gates holding spring for the carbon brushes in place. This allowed me to remove the spring and spray some WD40 into them to make sure that they came in and out freely. The brushes had about half their life left. Leave the springs out along with the brushes pulled out.

You will now be able to see the commutator. You can see that there is alot of carbon buildup on the copper, along with wear patterns from the brushes.

This can be cleaned with a bit of sandpaper. I put the cage end into the chuck of an electric drill, held the sandpaper against the commutator, and spun it to smooth and clean it.

Then I used a dental pick to clean between the copper contacts on the commutator for any bits of copper or carbon that might short it.

The rear bushing got spray of wd40 too. I pressed the rear metal housing back into place again. This will require a few goes and some patience. A few taps of a small hammer bent the crimps back into place.

I installed it back into the car. VCDS along with the cable was used to reset the all errors on the car. After a month of use, the fan works now as expected, and there are no errors showing up on VCDS. Success!
No comments:
Post a Comment