Friday, November 25, 2016

Repairing Audi A4 B8 8K door not unlocking with remote fob

When you buy a pretty premium saloon, you would expect reliability. However, I have found that the german engineering of the Audi a bit underwhelming in terms of both reliability and ease of repair. Too often, small little niggley things have given up the ghost on the A4. The latest to go was locking mechanism on the drivers side door. When I tried to unlock the door with the remote key fob, the door made made a grumble but failed to unlock. It would require a second press of the fob to unlock the door, or else it wouldnt open at all. Instead, I would have to roll down the windows with the fob and open the door by reaching in and opening it from the inside.
I also noticed that the automatic locking of the door when the vehicle went over 30kph was making a strange noise on the drivers side.

I tried a few different solutions outlined on the various forums:

  • Pull the outside and inside handle at the same time until you feel it click: This appeared to work for a while, but failed again. 
  • Spray WD40 over all the moving parts including lock tumbler and handle cable: No effect
  • Dismantle door lock module and grease all parts: no effect
Using the VAG-COM VCDS diagnosis software and cable, I found a that the door lock module was throwing a "outside limit" error. Worse again, after a while, the issue appeared in the passengers side door too. Due to the noise that the locking mechanism made, I suspected the door motor. As such, I removed the trim and then the paneling of the door. There are about 6 torx screws that you have to remove to unfasten the paneling. Then you have to start pulling out the panel from the bottom. once you get the top, you can lift it upwards to remove it. Next, you can remove the blue internal door handle cable by unhooking it from the door handle side. Once that is done, you have to remove the outside door handle cable from the lock module. Reach into the door frame and twist the yellow catch on the end of the cable going into the door lock module. Next, remove a rubber gromit on the edge of the door frame to expose a grub screw securing the lock tumbler. Loosen this, and pull out the lock tumbler from the outside. Then to remove the door lock module, you will have to remove two large bolts from the outside edge of the door frame. Then you can reach in and remove the loosened door lock module.

Take the module to your work bench and remove all the screws on the outside. Open up the small gray hatch window. You will see two axels coming out from the main housing into the locking mechanism. Insert a flat screwdriver and prise the axels from the lock mechanism. You will be left with just the main housing. Using a spludger tool, prise the two half of the housing apart. Inspect the two halves when apart- if the water proof gromit has come loose, press it back into place.

Inside, you will see the two motors of the module. Remove the largest. Clean the two contact that insert into the motor. I used some fine (2000 grit) sandpaper. At this stage, I tested the motor using a 12v supply and found that it struggled to turn without help. There was obviously something wrong with it. Using a small screwdriver, lift the two tabs on the end of the motor. You can then prise the end off the motor. There was much carbon dust in the motor from the brushes. As such, I tapped the motor on the desk to knock it out. The commutator on the motor was blackened from the brushes. Again, with the fine grit sandpaper, this was quickly cleaned up. You can remove the brushes with a sim card removal tool. I cleaned these up with a small rag. I put the motor back together and tested it with a 12v supply. It ran perfectly.

Finally, you can put everything back again. Using the VAG-COM VCDS diagnosis software and cable, I reset the error codes. I tested the door, and it worked perfectly!. A month later and it still hasnt given any problems or caused errors in VCDS.

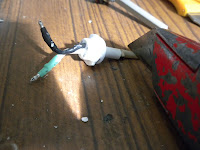
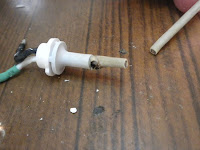
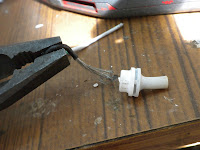
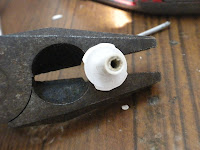
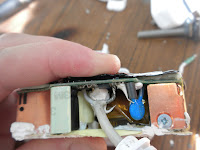
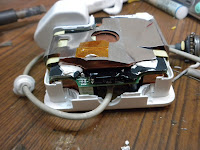
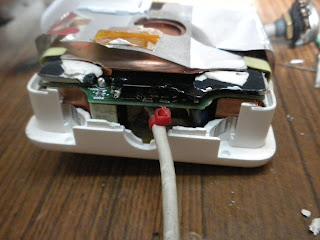
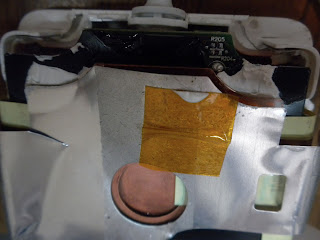
Note: I had a second door stop unlocking that the guide above did not repair. Instead, I had to replace the "bowden cable" to fix this. You can see it in the photos below with the sky blue rubber around it. It appears That these do not move smoothly enough after a few years to allow the lock to reset back to its previous position.

Sunday, August 10, 2014

Building a RaspberryPi Time Capsule: The cheap, fast and simple guide


I am a longtime fan of Apples "Timemachine" data backup software. Having used multiple flavours of backup software on Linux and Windows, Timemachine has been by far the simplest and easiest one to use. In its simplest form, you only need to plug in a bog-standard hard drive into your Macbook to save your backups. But what if you couldn't even be bothered plugging in a USB drive? Is there a way to do it wirelessly? Good news! Apple sell a wireless backup solution, the "Time Capsule". The bad news? Its $350. There is, however, a cheaper solution.


Since the Raspberry Pi hobbyist development board came out, there have been many guides written on how to convert it into an Apple Timemachine compatible device. Although they work, I have found them to be overly complicated for what has to be done. Also, they require that the Raspberry Pi has a static IP, something that is inconvenient if you want to set up your backup on a new network when you move house, for example. Thankfully, I found one guide that offered a simpler solution. This guide removed much of the un-needed steps from the previous guides. This guide does require that you do the first preliminary backup over the network. For me, with over 300Gb of data to backup, this would have taken over 24 hours to transfer. It is much faster to do the preliminary backup over USB. As such, I have merged the two guides above into one, cheap, fast and simple Raspberry Pi - Time Capsule guide. 

Parts list

Required 

  1. SD card
  2. Raspberry Pi
  3. 3.5mm Portable Harddrive 

Optional 

  1. USB Wifi dongle 
  2. Philips screwdriver
  3. Sharp blade
  4. Mini USB cable 
  5. Soldering iron and solder

Setting up the Hard drive 

  1. Plug your USB into your Macbook. 
  2. Click on Applications - System Preferences - Time Machine. 
  3. Tell Time Machine which drive to use for backups by clicking the “Select Backup Disk…” button, selecting your newly plugged in drive, then clicking the “Use for Backup” button. 
  4. Time Machine will schedule your first backup to start in just two minutes. You will have to wait a while, as this can take a few hours. 
  5. Unplug the hard drive when done. 

Setting up and configuring the Raspberry Pi 

  1. Download the latest "Raspbian" OS image file for the Raspberry Pi. Dont download the "NOOB" version, as this will require that you use a TV to set it up. We will be using SSH in this guide. 
  2. Burn the OS image to the Raspberry Pi. If you are using OSX, use "RPi Easy SD card setup" app. This will take about 20min. Dont worry if you get an error saying "Could not eject card" at the end. It should have completed successfully. 
  3. Put the SD card in the Raspberry Pi. Connect an ethernet cable from the Raspberry Pi to your router. Power up the Raspberry Pi. 
  4. Log into your router on your internet browser and get the IP address of the Raspberry Pi. You can also get this using a TV connected to the Raspberry Pi. 
  5. Open a terminal in OSX, and ssh into the raspberry Pi. The password is "raspberry"
    $ssh pi@THEIPADDRESS 
  6. Update software on the device
    $sudo apt-get update 
    $sudo apt-get upgrade 
  7. Install the software that we will need. Netatalk is used for creating NFS shares, the others are used for reading the HFS formatted USB drive
    $sudo apt-get install netatalk 
    $sudo apt-get install hfsplus hfsutils hfsprogs 
  8. Edit the fstab file to automatically mount the usb drive on boot up
    $sudo nano /etc/fstab 
  9. Add the following lines, then ctrl + c to save and exit. Note: "sda2" was the partition on my USB drive that needed to be mounted. Yours may be sda1. Run "dmesg" to see which one you will have to mount. 
    /dev/sda2 /mnt/TimeMachine hfsplus rw,force,exec,auto,users 0 3
  10. Open up the permissions of the mount directory
    $sudo chmod 777 /mnt/TimeMachine
  11. Attempt to mount the usb drive:
    $sudo mount /dev/sda1 
    If it mounted successfully, try and write to the USB drive using "mkdir /mnt/Timemachine/testDir". Note: if you reboot the Raspberry Pi and the line in the fstab is not correct, the raspberry Pi will not boot up properly again. The easiest way to recover will be to write a new raspbian image to it. Also use the mount command to check that /dev/sda2 is mapped to /mnt/TimeMachine. Make sure that the letters rw are in the same result. This ensures that we have read/write access to the partition.
  12. Add the directory to the "Pi" user (the user that you will be logging in from your macbook with)
    $sudo chown -R pi /mnt/TimeMachine 
  13. Edit the Netatalk config file to share the Timemachine directory
    $sudo nano /etc/netatalk/AppleVolumes.default 
    Add the following line to the end, save and exit.
    /mnt/TimeMachine "Time Machine" options:tm 
  14. Restart netatalk
    $sudo service netatalk restart 
  15. Back on your macbook, a share called "raspberrypi" should appear on the left side of your finder window. If not, in finder, click on Go - Connect to server and type "afp://raspberrypi" or "afp://IPADDRESSOFRASPBERRYPI" into the address window. After you press enter, the shared directory should appear.
  16. Go into Timemachine again. Remove the previous backup disk. Click on "select disk" and select the raspberry Pi. It will prompt your for a username and password. Use "pi" for the username and "raspberry" for the password.
  17. Thats it! The macbook should recognise the previous backup and continue from there. After the previous backup over USB, the second backup over wireless should be alot faster.

Enabling wireless on the RaspberryPi Time Capsule (optional)

You can remove the requirement of having an ethernet cable between the router and the Raspberry Pi by plugging in a small usb wifi dongle into the Raspberry Pi and configuring the wireless. I used a Ralink RT5370 from ebay for this. To connect your Raspberry Pi to the wireless network, here are the steps.

  1. SSH into the Raspberry Pi over ethernet (see above). 
  2. Install the WPA wireless tools
    sudo apt-get install wpasupplicant wireless-tools 
  3. Edit the networking file to use the wpa-supplicant file for wireless configuration
    sudo nano /etc/network/interfaces
    Ensure the wlan0 section uses the following lines:
    allow-hotplug wlan0
    iface wlan0 inet manual
    wpa-roam /etc/wpa_supplicant/wpa_supplicant.conf
    iface default inet dhcp
    
  4. Edit the wpa-supplicant file
    sudo nano /etc/wpa_supplicant/wpa_supplicant.conf
    Ensure that it has the following lines
    ctrl_interface=DIR=/var/run/wpa_supplicant GROUP=netdev
    update_config=1
    
    network={
            ssid="YourSSID"
            psk="password"
            key_mgmt=WPA-PSK
    }
    
    
  5. Save the file, disconnect the ethernet cable, and reboot the Raspberry Pi. It should now connect to the wireless network.

Powering the Raspberry Pi off the hard drive (optional)

I did not want to have to have a separate power supply for the hard drive and the Raspberry Pi as both would be kept together at all times. As such, I looked into powering the Raspberry Pi off the supply of the hard drive. 
  1. Using a sharp knife, cut the male, full size usb connector off your mini usb cable, exposing the four wires. 
  2. Tape up the two data lines, we wont need them and we dont want them touching anything. They are normally the green and white wires. 
  3. Expose around 2mm of the conductor from the 5v (red) and ground (black) wires. Tin them with solder and the soldering iron. 
  4. Dismantle your portable hard drive. Each one will be different. For mine, I had to remove 4 screws from the underside, and slide out the harddrive and controller from one end.  
  5. Look for the four wires going from the controller to the hard drive. There should be two black, one yellow and one red. We are looking for the 5v wire (red) and either of the ground wires (black). Solder the red and black wires from the USB cable to the points on the controller board that the corresponding hard drive wires are soldered to. 
  6. Find a way to route the cable out of the portable hard drive caddy. I drilled a small hole with the screwdriver and pulled the usb cable through it. I also tied a knot in the cable on the end inside the caddy so that it would not get pulled out through the hole if it was tugged on. 
  7. Put everything back together, power up the portable hard drive, and plug in the Raspberry Pi. The raspberry Pi should power up successfully. 

Tuesday, April 29, 2014

Coding Python (Pydev) on Ubuntu 12.04 with Eclipse Juno

A short blog post. After having installed the latest pydev on the newest eclipse juno, I found that python would not work. All the relevant buttons for python development did not appear, even though the software manager reported that pydev was installed. As such, to get both working correctly I had to do the following:

  1. Following this guide, http://www.vogella.com/articles/Python/article.htmlH as far as installing pydev. However, do not go any further as installing pydev 3.0 didnt seem to work. Niether did it work on Eclipse kepler 4.0.3. A similiar issue was reported here: http://stackoverflow.com/questions/19916925/problems-downloading-artifact-error-reading-signed-content
  2. As such, when eclipse is installed, go to help-> install new software. For the source, type: “http://pydev.org/updates”. 
  3. Uncheck “show only the latest versions of available software”. 
  4. Select Pydev for Eclipse version 2.8.2.
  5. Works!

Monday, April 28, 2014

Correcting incorrect time-offset on an Ubuntu server

Here is a quick post on a solution to an issue that affected my Ubuntu server. I noticed that me cron jobs were getting executed about a hour or two later than they were set to run at. Logging into the server and running the command "date" confirmed what I easily suspected: that the clock was off by 1h 45min.

Running the command:
$sudo ntpdate
to update the clock returned the error
ntpdate - no servers can be used, exiting.
So then I ran the command
$sudo ntpdate 0.uk.pool.ntp.org"
which returned the following:
28 Apr 14:28:40 ntpdate[23357]: step time server 109.123.121.128 offset 2311.837165 sec.
Great, I thought, problem solved. Unfortunately not. When I ran the command "date" again, the server was still off by an hour:
$date
Mon Apr 28 14:33:45 UTC 2014.
It was actually 15.33. Suspecting an issue with Daylight Savings Time (DST) was the issue, or to be more specific, that the server wasnt using it, I looked to enable it. A quick Google informed me that an Ubuntu installation gets its DST settings from knowledge of its physical location, and the time server that it is conencted to. I had already configured it to use a suitable time server with the command "$ sudo ntpdate 0.uk.pool.ntp.org", so I had to reconfigure its location from the terminal. To do this, run the following command:
$sudo dpkg-reconfigure tzdata
You will be presented with a terminal GUI. Select your locality. Then when completed, you will be greeted by the updated time: 
Current default time zone: 'Europe/Dublin'
Local time is now:      Mon Apr 28 15:33:45 IST 2014. Universal Time is now:  Mon Apr 28 14:33:45 UTC 2014.
Running "date" now confirms the corrected time:
$date
Mon Apr 28 15:33:56 IST 2014

Problem solved! 


Tuesday, January 7, 2014

Repairing intermittent wifi/wireless on a 15" Macbook Pro 2011

From reading a couple of articles on this site, you may have noticed that although I may be critical of some Apple goods, in general, I am a fan. However, there are some times that I am extremely fustrated when their hardware breaks, such as when my MacBook Pro 15" wifi decided to start acting abnormally. For reference, it have a Macbook Pro 15" Unibody Early 2011 (Released February 2011 2.2 GHz Quad-core Intel Core i7 Processor, thunderbolt, Broadcom BCM94331PCIEBT4AX wifi/bluetooth card)


The issue
After a while of use, the wireless internet dies. The signal strength indicator fan in the top right corner still indicates five full bars. Right Clicking on the icon and clicking on "Turn wi-fi off" makes the fan icon go blank as it should, but the previously connected to network remains in the list check marked, which it shouldnt. All other wifi networks in the area disappear from the list. The status at the top of the drop down box says "Wi-Fi: looking for networks".
Right clicking on the icon and clicking on "Turn wifi-off" makes the icon go blank, as it should. Right-clicking on the icon and clicking on "Turn Wifi-On" does not enable the wifi. The fan icon stays blank, which it shouldn't. The previously "connected to" network remains check marked, but there is no connection to the internet.
Putting the laptop to sleep with the lid and waking it again results in five faded bars, but now no wifi networks can be found, and there is no connection to the internet. The issue occurred round once a day at the beginning. By saving my work and rebooting the laptop, the issue has been manageable. However, it became unmanageable when it occurred more and more often to the point where I had to save my work reboot my laptop every 1-2 hours of use.

What I tried to do to repair the issue

  1. Reboot the laptop. A temporary solution is to reboot the laptop, in which the wifi performs as it should until the issue occurs again.
  2. Use a USB dongle. A semi permanent solution was for me to buy a Ralink usb wifi adapter, that worked fine but was not ideal. It felt a bit ridiculous and cumbersome to have to use a $10 usb adapter to repair a Macbook Pro that cost $2000.
  3. Connect to a different wifi network. This did not work. The issue occurs when connected to other wifi networks, such as my parents one at home. This hinted that it was not a wireless router issue.
  4. Reset PRAM, NRAM, etc. This was only a temporary solution, as was just simply rebooting the laptop.
  5. Deleting my Airport settings files. Again, this was only a temporary solution, bus so was simply rebooting.
  6. Wiped the harddrive and installed Mountain Lion. The issue remained, even with a clean installation with no restoration of my old settings from TimeMachine. The issue was the same when I installed Lion, and Mavericks. I even noticed the same issue once with the wifi when I booted off just the OSX installation disk. As such, I believed that the the issue is hardware related.
  7. Visual inspection of the hardware. I took off the bottom cover of the laptop to see if there are any visually obvious loose connections, but there are none.
  8. Took the laptop to an authorised Apple Repair Center. They did nothing. As it was an intermittent issue, they said that the wifi was working fine when they ran their DVD of hardware tests. As far as I know, they don't do any long-term tests, even though I had requested them to do so. They blamed the wireless router (which I knew was not an issue, see above) and mu wifi settings (which I also knew was not an issue, see above).
  9. Replaced the wifi card. This did not work. I bought a new Broadcom BCM94331PCIEBT4AX for around $35 off eBay. Following a guide on ifixit, http://www.ifixit.com/Guide/MacBook+Pro+15-Inch+Unibody+Early+2011+AirPort-Bluet ooth+Cable+Replacement/5887 I replaced the card easily enough. It was just around 10 screws in total, easily manageable in an hour if you take your time. Unfortunately, the issue returned again after a few hours of use. 
  10. Replaced the motherboard, and the screen. I assume means that the wifi antennas got replaced. This did not work. On an unrelated issue with the graphics card, Apple agreed to replace the motherboard, LVDS, and LCD screen out of warranty (really good of them). Unfortunately, their authorised repair center took nearly 6 months to do the repair (again, they were a bad representation of Apple). Unfortunately, the wifi issue returned once again after a few hours of work.


What repaired it in the end
Finally, in a last ditch attempt, and as it seemed to be the only part in the laptop not replaced (including software), I bought a replacement wifi/bluetooth cable off ebay for around $30. This worked! It has been going strong now for nearly three weeks with no drop in wifi. It was pretty expensive for a simple black ribbon cable but I am glad that it worked. There was no visual damage to the old cable, but I suspect myself that the bottom cover may have pinched the cable against some edge near the motherboard, thus causing the intermittent drop-off in wifi.

Update 20/01/2013 : I have re-opened the laptop to inspect the location of the ribbon cable (Figure 1). In (Figure 2) you can see the point on the rear of bottom cover (2) that places pressure on the end of the ribbon cable. You can see that there is a visible imprint on the plastic foil covering the back of where they are in contact. Due to the level of imprint and its location, I suspect that this causes excess pressure on the cable connector when the laptop receives knocks from the underside.

Figure 1: The faulty macbook wifi cable is shown in (1). The point on the back cover that I suspect may have been putting too much pressure on the ribbon cable is located at (2)

Figure 2: The point on the rear of bottom cover (2) that places pressure on the end of the ribbon cable. You can see that there is a visible imprint on the plastic foil covering the back of where they are in contact. Due to the level of imprint and its location, I suspect that this causes excess pressure on the cable connector when the laptop receives knocks from the underside. 


Thursday, April 11, 2013

Repairing a charred/burned/broken cable on an Apple Magsafe charger

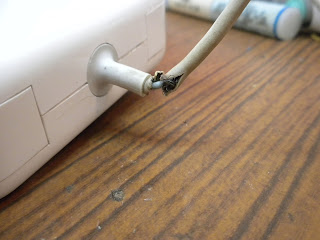
I have spoken in a previous blog post about some issues with Apple hardware design here. To briefly recap, it is of my beleif that in general, Apple hardware is very well designed. However, they often overlook functionality in favour of form, sacrificing important aspects such as durability so that "it looks nice". A good example of this is the Magsafe adapter. In a bid to improve aesthetics, Apple shortened the rubber strain-relief grommet that protects the power cable from fraying at the charger end, and the connector end to the laptop. The metal strands inside the cable gradually begin breaking from normal use until eventually, with only a few strands left carrying a large amount of current, the last few strands overheat resulting in a burning smell and the the connection breaking completely. After Apple received many complaints with regard to this problem with the original Magsafe adapter, they extended the length of the rubber on the grommet to improve the durability of the cable. However, in me experience, this wasnt enough: the cable still ends up fraying, and the hardening of the rubber in the grommet over time only aggravates the issue. They also introduces a replacement program, details of which you can find here. However, this does not cover anywhere outside of the United States.

In case you find yourself in a similar situation as I was, here is a short guide on how to repair the cable on your magsafe adapter, without having to fork out the $80 for a new one. 

First off, you will need a large pliers, a high wattage soldering iron (I used a weller 75watt), solder, some cable ties of various sizes, a drill and a small drill bit, some glue and a sharp knife. 

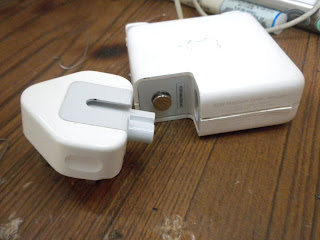
1. Remove the plug from the Magsafe adapter. 

Removing the plug from a Magsafe adapter
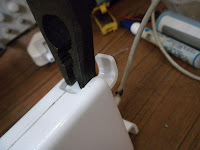
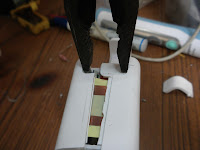
2. Apple have ultrasonically welded the two plastic shells that cover the adapter. They do this by vibrating the two halves against other at such a high rate to melt the plastic at the junction and thus sticking them together. This results in the Magsafe adapter being pretty difficult to open without making some messy cuts in opening it up. So here is a quick tip on opening them up: Flip open the cable tidy arms and insert the pliers into the gap. Then slowly and firmly open the pliers pushing the two parts of the case apart in the process.

Insert a pliers in the gap for the cable tidy 
Open the pliers, splitting the case open 

Voila! An opened magsafe adapter with very little tool marking or scratching to the plastic.

Opened Magsafe adapter

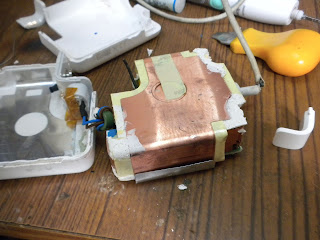
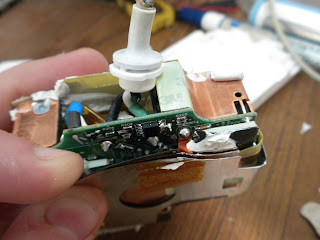
3. Now, bend some of the plastic and copper shielding back around where the cable meets the circuit board to reveal two large solder points. Make a note of where the black cable and the white cable are soldered into the board. To help you, the board should be marked "GND" near the black cable. 

Solder points for Magsafe cable. White is positive, black (GND, cable shield) is negative


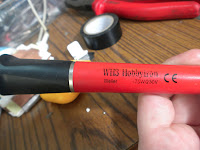
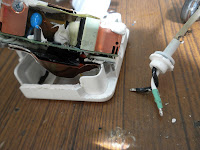
4. Using a high power soldering iron, desolder the two points and gently pull the cable from the board. You may find it easier to solder the points by removing the shielding from the circuit board. I left it on here. 
Weller 75w iron
Cable successfully desoldered from Magsafe adapter


5. Taking the cable, use a sharp knife to make a cut after the break in the cable. 

Cutting the good cable from the damaged cable
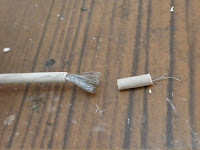
The damaged part ad grommet removed from the cable


6. Now, using the pliers again, pull the old black wire, and the white wire out of the grommet.  You will be left with a hole in the grommet as shown below. 

Removing the wires from the damaged part of the cable
The grommet, with the outside insulation of the cable left


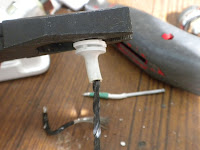
7. Now, drill a hole all the way through the grommet removing the old cable and some of the grommets plastic along the way. You should make the hole large enough to pass the cable through, as shown below. 

Drilling the outside insulation of the damaged cable from the grommet
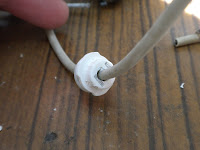
Weaving the good cable through the now cleared hole in the grommet


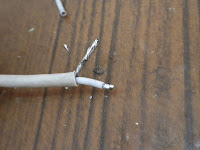
8. After you have passed the cable through the grommet, it is time to prepare the cable for soldering back to the board. Using the sharp knife, remove about 20mm of rubber insulation from the cable. Further remove about 3mm of insulation from the inner white wire. Then tin the ends of both cores using the soldering iron as shown below. 


Removing some outside insulation from the good cable
"Tinning" i.e. applying solder to the exposed positive and negative cable.
 A good tip here is to twist the ends before soldering. 


9. Now, carefully solder both wires back to their respective points on the Magsafe circuit board. 

The ends of the cable correctly soldered into place
on the circuit board. 

10. Place the circuit board back into one of the plastic shells of the cover. If you have done everything correctly so far, the adapter should be able to charge your laptop as this stage. If you are comfortable testing the adapter while the cover is off, do so now. Or else continue with the guide. 

Placing the circuit board back into one of the covers


11. Using a small cable tie, wrap it around the cable as tight as you can just inside the plastic cover. This is done so that the cable cannot be accidentally pulled out of the adapter during use. 

Adding a cable tie to the good cable


12. Run the plastic grommet down the cable back into position in the plastic shell.

Placing the grommet back into the shell

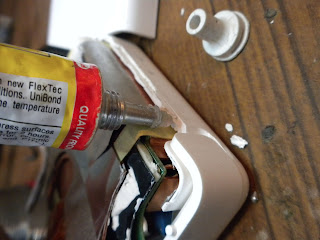
13. Using some glue, make a small bead all around the perimeter of the shell. Use the glue sparingly, but cover all the edges where both halves meet. 

Adding glue to the edge of the shell


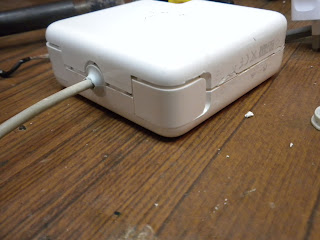
14. Press the second half of the plastic shell back onto the Magsafe adapter. Wriggle the two halves to get them into place properly, and then firmly press the two halves back together. 

Squeese the two halves together to make sure that the glue spreads. 


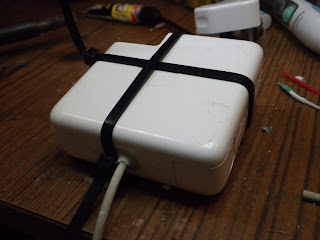
15. Using some large cable ties, wrap them around the Magsafe adapter and tighten them using a pliers. You will need the two halves to be very tight together as the glue dries, or else the two cable tidy arms can fall out.

Adding cable ties around the adapter to make sure that they glue together properly.


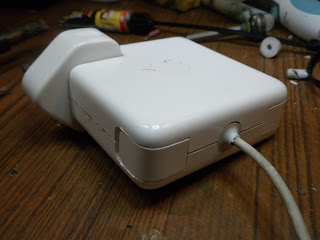
16. When the glue has dried, remove the cable ties. You should be left with a working adapter that hardly looks like it was opened at all!

The finished, now working, adapter. 


Unfortunately I accidently ripped some of the rubber off the grommet as I was drilling through it, so go easy on that drilling! I have also repaired a few adapters where the cable has broken and burnt on the connector end. This is a slightly more difficult repair, but I can make a guide if requested.